I have been real busy the past one week- packing, making kachoris and samosas for V, trying my hand at macarons (yeah, I know, me too!!), attending a friend’s graduation walk and flying to Denver. V has some training here in Denver and I tagged along. Now for the next few days I am as free as a bird! No cooking, no cleaning, no house to look after- so now, I have all the time to blog and post the backlog of the recipes I have- sundried tomato bread, zucchini pasta, chilli paneer, Indian chowmein, macarons and lavender truffles. Today, though I won’t be posting any, but will talk about the culinary experiments that happened while the above recipes were being tried in the background.

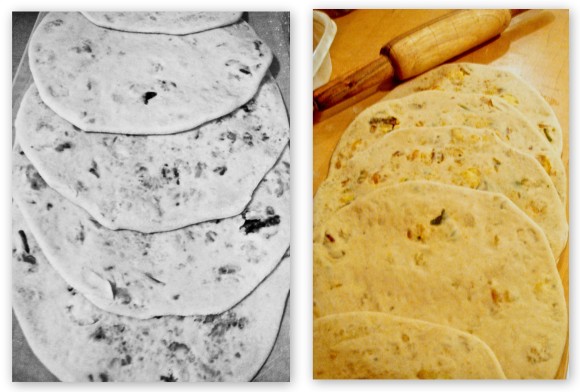
The other day, for dinner, I thought I’ll make Paneer Parantha. For afternoon lunch, I had made dal makhani (a signature Punjabi dish made from boiled lentils that are slow cooked with tomato puree and a good amount of butter/cream) and  since, there was some leftover dal makhani, I decided to pair it with some paranthas for dinner. Had paneer in the fridge- and paneer paranthas sounded like a good choice!

Paneer paranthas (flat wholewheat bread stuffed with Indian fresh cheese)- or any stuffed parantha takes me back to my MBA days and the dhaba outside our college. They served one of the best paranthas in Delhi, and they were the culprit of my weight gain during college. Well, ok, just a part of it.

All the time I was in college and the countless times I had their paranthas I never once even thought of asking how they make it so good. I was always under the impression that I’ll have access to these paranthas- didn’t think I’ll end up miles away! Now, I miss the chicken paranthas, the chilli paneer and dal makhani that had become a staple to my diet during college days.

Anyways, I decided to try making paneer paranthas at home. I have tried making other stuffed paranthasaloo (potatoes), mooli (daikon radish) , gobhi (cauliflower). But, this was my first attempt at paneer paranthas. I decided to grill the paneer in my Cuisinart GR-4N 5-in-1 Griddler. I love the 5-in-1 griddler – it has made making a quick snack/meal so much more easy! Well, the paranthas didn’t come out as good as the college ones, so I am not posting the recipe. They were good, but not as good and thus, the search is still on. I still crave for my college paranthas and when I’m in Delhi next (just a few weeks from now 🙂 ), I am definitely going there to relive my gastronomical memories!

I also experimented with muffins. Now, the reason why I HAD to make muffins is because recently I made macarons. You ask, what does macaron have to do with muffins?! Well, macarons have filling in them and when you don’t plan too well and are experimenting with different possibilities, you are left with a lot of filling. Now, since I don’t have the option to keep the filling and using it on a different batch of macarons- I either had to throw the filling or concoct something to use it up. And, the latter is what I did. I added some cream cheese frosting with white chocolate ganache, added eggs yolks mixed with eggs (from the egg white separation for the macarons), mixed in cake flour, baking soda, baking, powder, salt– found the batter to be too thick, so added hazelnut creamer (in an attempt to finish that off!), and as a final touch some poppy seeds and popped them in the oven at 350 F for 18 minutes!

And well, they actually tasted good (they don’t look that good though, but everyone knows not to judge the book by its cover!). They were soft (thanks to the cake flour;) ) and pretty flavorful- worthy enough for Office Thursdays!:) 🙂 :). V’s office people loved them, so much so that everyone finished them and hardly any one ate the store bought donuts that were there too!

The reason for not posting the recipe for either paneer parantha or the muffins is because since they were so experimental in nature, I just did not pen down the ingredients. I could have for the paneer paranthas, (the muffins were a mix of a lot of leftovers so it was impossible for me to give exact amounts), but, like I mentioned before, I am still in search for the perfect paneer parantha recipe, so till then you and I both will have to wait!

Keep reading the blog for the recipes that did make the cut!

One of my favorite toovar dal/yellow dal recipe made even easier in the crockpot.


This picture is the photo that was published with the original post. Yup, my photography skills have improved significantly and hopefully the improvement continues! Also keep in mind that while the updated photographs are from Nikon D7000 during natural day light, the original pics were clicked with my iPhone at night under a bulb’s light:)

I finally got it!! V had been guarding his lentil recipe all this while. For the uninitiated, V makes this awesome toovar dal (cooked lentils) in the slow cooker. This was the recipe that got him by his bachelor days. And uptil now he wouldn’t tell me how he makes it. He always throws me out of the kitchen whenever he makes it (which has been twice before) so that I don’t get to know his secret recipe (rolling eyes).

Now, for days I had been craving his dal, with some rice. And since the rare occasions that he cooks fall on Sundays and all the previous Sundays we have been out- that craving just kept increasing. Finally, the Sunday that went, V decided to give in to my cravings and set his foot in the kitchen. 🙂

This time though, he was willing to share his secret!! Well, the opportunity to be featured on my blog- not just in photos but as an actual contributor- that was too big for him to pass on, so he let me in on his secret.

So there I was, with my phone in hand taking down notes and pictures while V explained how his dal is made.

Here’s how to make V’s Crockpot Dal:

4.6 from 11 reviews
V's Crockpot Lentil Recipe
 
Prep time
Cook time
Total time
 
Author:
Recipe type: crockpot, slow cooker, lentils, dinner, lunch, entree
Cuisine: Indian
Serves: 3-4
Ingredients
What you need for the slow cooker:
  • 1 cup split pigeon peas (toovar dal)
  • 3.5 cups water
  • 3 roma tomatoes, cut in big slices
  • ½ tsp turmeric
  • Salt, to taste
For the tadka, you need:
  • 3 garlic cloves, cut lengthwise, in slivers
  • 2-3 tbsp ghee (V adds more, I think but, so that I don't freak out he mentioned a "smaller" amount)
  • 3 tsp cumin seeds
  • 2 tsp coriander powder
  • 1-2 tsp red chilli powder
Instructions
  1. Take the dal (split pigeon peas), and wash it properly. Add the water, tomatoes, turmeric and salt. Put the lid on the crockpot and turn it on HIGH. Let cook for 4 hours.
  2. After 4 hours, the lentil should be cooked. Now comes the part that holds the key to the dal being so freakingly good.
The secret to his dal, according to V is the tadka (the tempering of spices).
  1. To temper, heat clarified butter (ghee) to a real hot temperature in a saucepan. Add the garlic, fry til they turn brown. Add the cumin, coriander and red chilli powder. (You might want to open a window, because the spices do tend to get into your system). Fry till it looks a little burnt. (I confirmed with V and he said thats how its supposed to be.)
  2. Add the burnt looking tempered spices to the crockpot and quickly close the lid. After a few seconds, lift the lid- with a ladle take out some dal and put in the saucepan used for tempering. Scrape out any remaining spices in the saucepan, and add the liquid back to the crock pot.
  3. Serve it warm with rice and some curd. The dal has a very strong flavor of garlic but I think thats what adds to the beauty of it. 🙂
Variations:
  1. These days besides the tadka/tempering ingredients above, I also add the following- pinch hing, 1 tsp ginger julienned, 2-3 dried red chillies, 1 small onion finely chopped, 1 tsp sambhar powder. After I add the ghee, I add the cumin seeds and hing and let sizzle. Then I add the dried red chillies, followed by the onions and cook till translucent. Then I add the ginger and cook till ginger changes it color slightly, sprinkle in the sambhar powder- saute for a few seconds and then add it to the dal. Instead of coriander powder I add fresh dhania to the dal.

Tzatziki Dip
*UPDATED July 21, 2016: This post has been updated with newer photographs and a printable recipe. This tzatziki dip recipe was originally posted in January, 2011 and has seen me through many get togethers. I love making this dip for my guests or as a spread when I am making middle eastern wraps. Its light and refreshing and a great appetizer, which requires minimum effort in the kitchen.

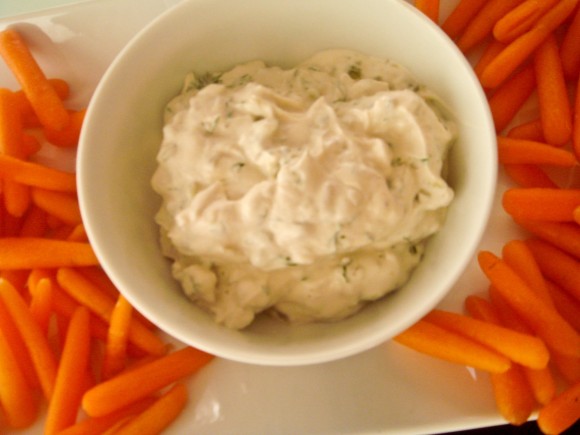
Below is a picture of the dip that went along with the original post. Even though I am updating my old recipes with newer pictures I like to keep one picture from the old post as a reminder to me and everybody that we all begin somewhere. 

ORIGINAL POST:

Tzatziki dip is a traditional greek dip. Its made of greek yogurt mixed with grated cucumbers, garlic, olive oil. Greek yogurt is basically, strained yogurt – the consistency has to be thick for the dip. Like the yogurt, the cucumber should not be too watery. After grating the cucumber, make sure to squeeze it real hard to remove the moisture from the cucumber. Tzatziki sometimes also has dill, parsley, or mint for an added flavor. I used dill and love the flavor it adds to the dip. Its a great accompaniment to pita, or a great dip to serve with cut vegetables.

I made the tzatziki dip for the coffee morning at my place and it was a hit. I mixed the leftover tzatziki with some leftover coleslaw and added macaroni and some boiled potatoes to it. It was one of the best macaroni salads I have ever tasted.

Tzatziki Dip

Tzatziki Dip

Read More →