There’s going to be chocolate.
Lots of it.
There’s going to be tragedy.
Plenty of it too.
And there are going to be cavities!
You bet! A lot of that too!
This is the exact kind of post my dentist would disapprove of.
And that is exactly why, my friends, dentists and I could never be friends!
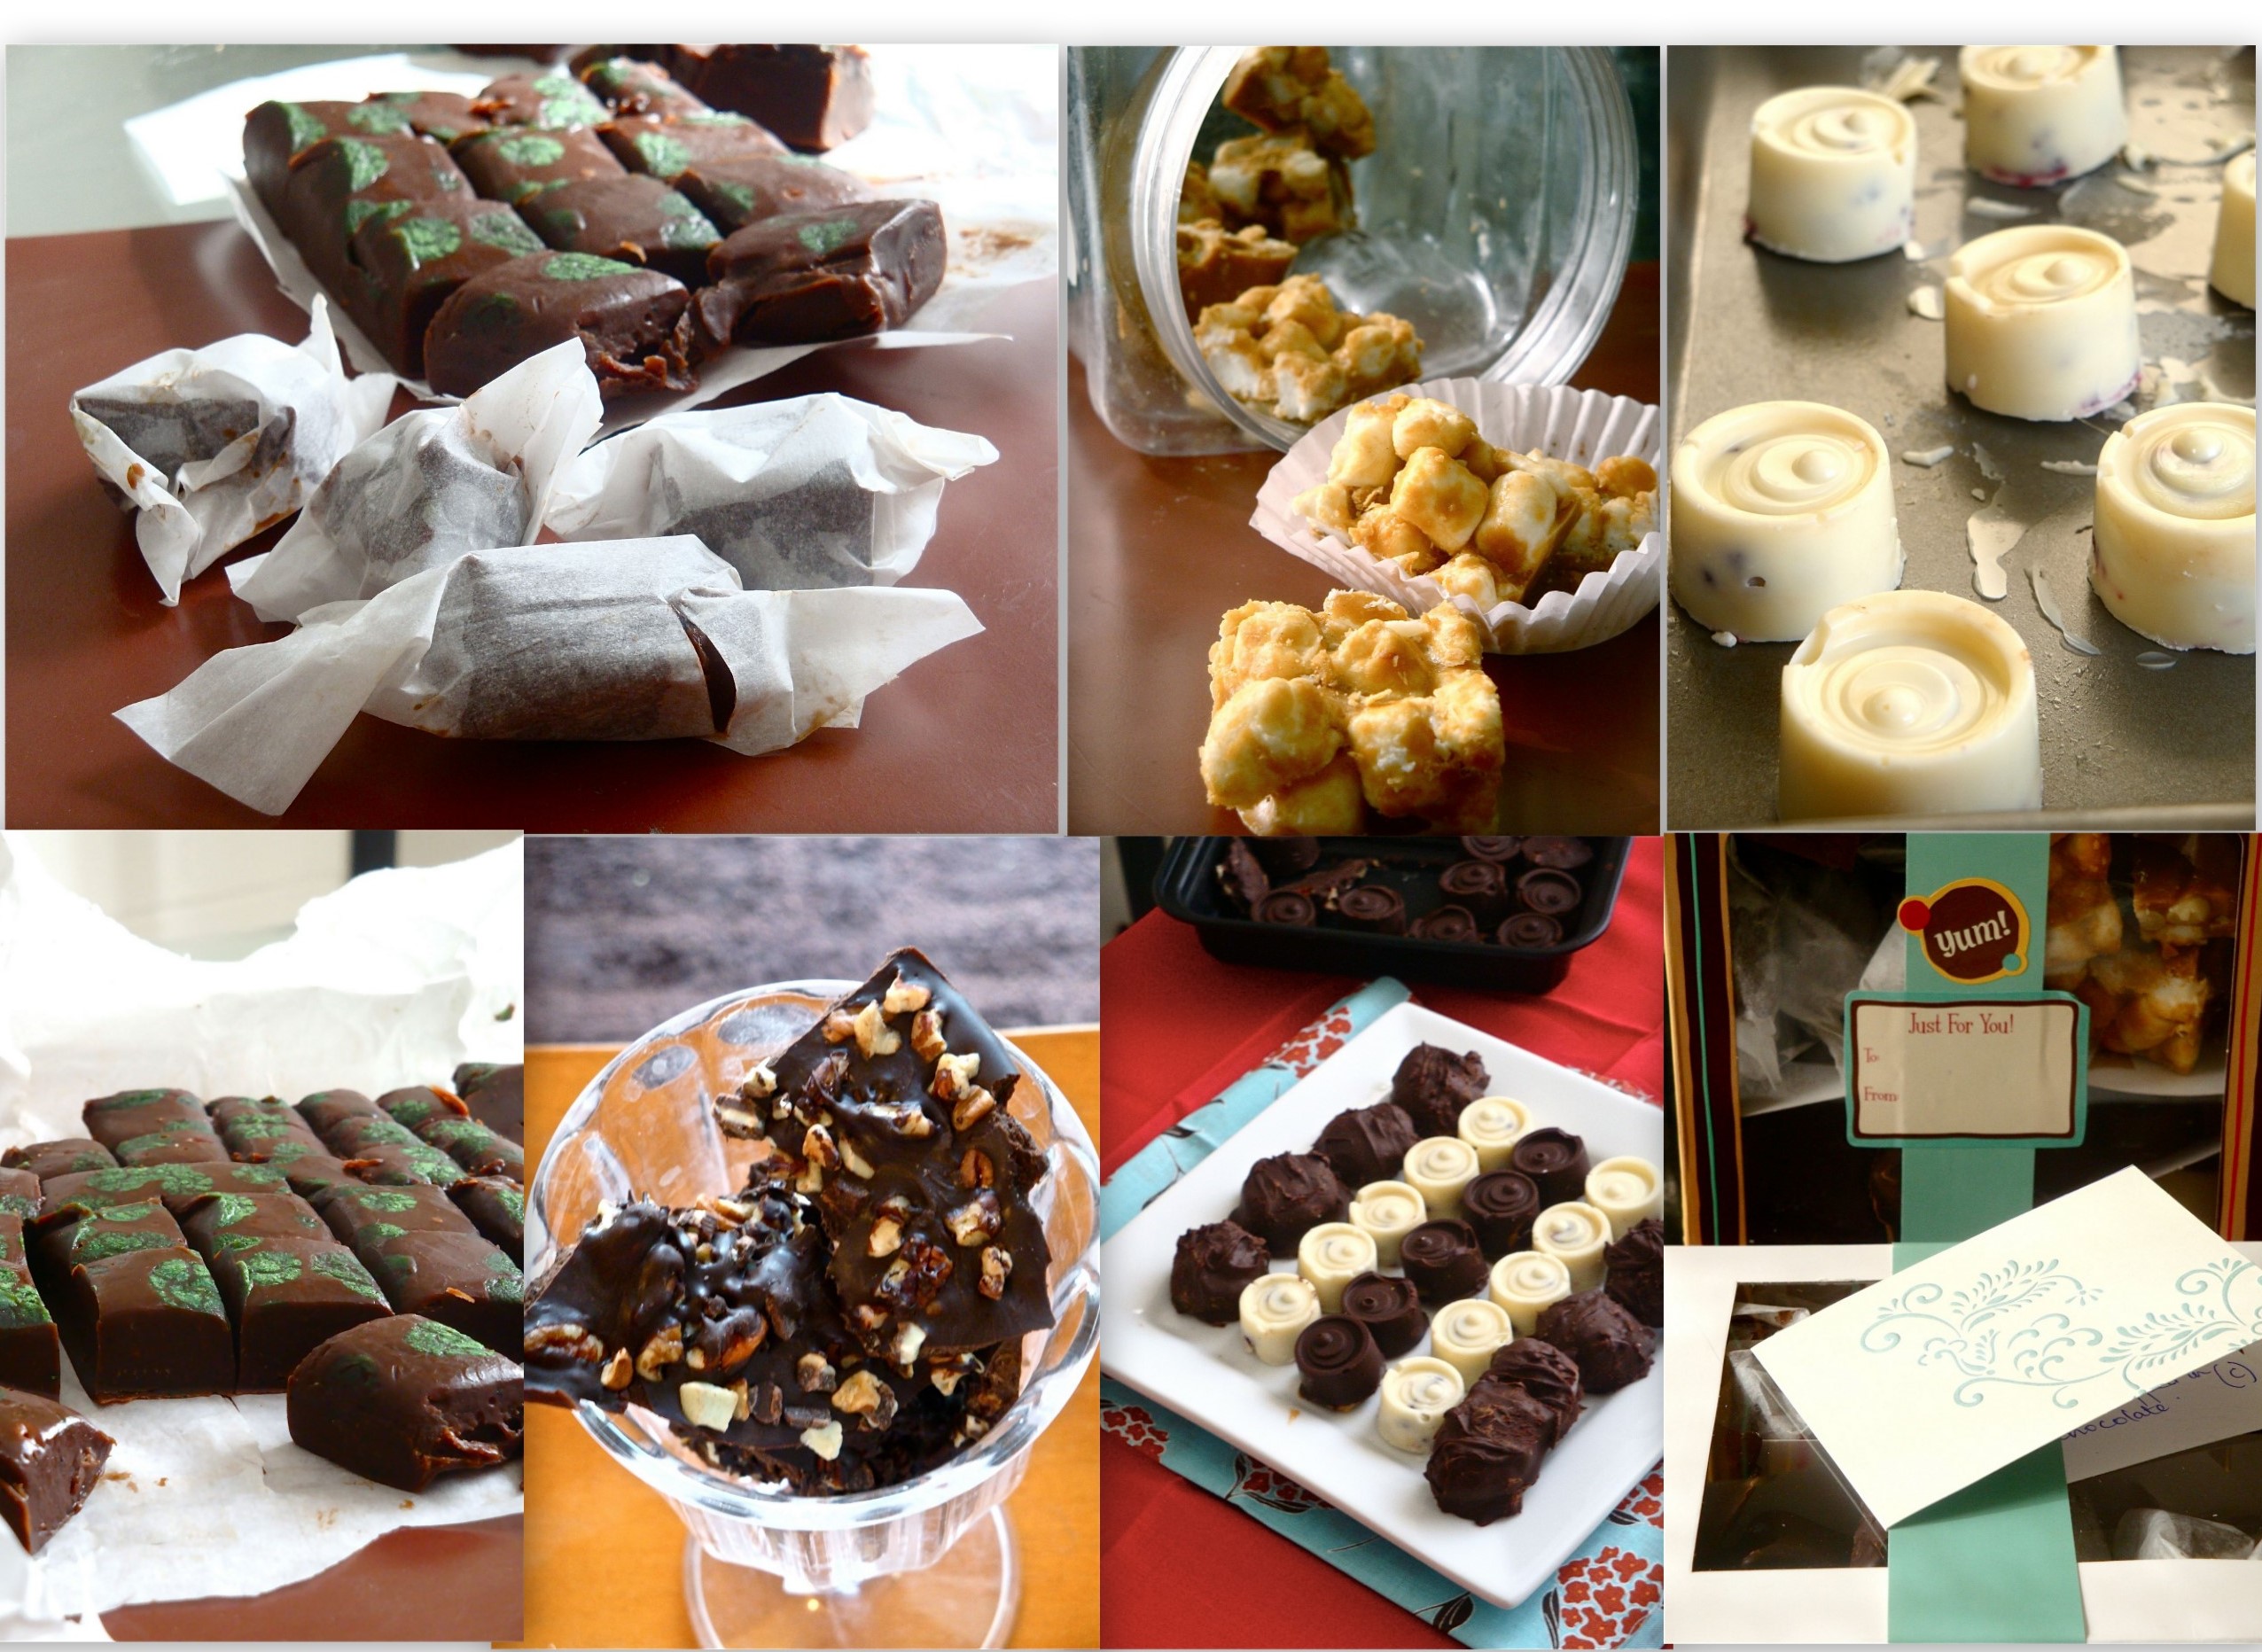
The August 2011 Daring Bakers’ Challenge was hosted by Lisa of Parsley, Sage, Desserts and Line Drive and Mandy of What the Fruitcake?!. These two sugar mavens challenged us to make sinfully delicious candies! This was a special challenge for the Daring Bakers because the good folks at http://www.chocoley.com offered an amazing prize for the winner of the most creative and delicious candy!
The challenge this month was to try our hand at bonbons, truffles, chocolate bark, pate de fruits, honeycomb and any other candy we would like to make.
I did have problems though. Especially with the non-chocolate candy- the pate de fruits and the honey comb. And I would like to blame the thermometer- at higher temperatures if left for too long (which was the case with most non-chocolate candies), the thermometer would bail on me, showing 888.8 F! WTH! And it happened on both my attempts at pate de fruits and when I tried making honey comb.
Paté de Fruits is definitely not my forte.
Paté de Fruits (pronounced pat de fwee, which translates to fruit pastes) are bite-sized pieces of real fruit puree jellies (sometimes with the addition of jam and/or dried fruit) rolled in sugar.
My first attempt at Paté de Fruits was making blueberry-orange pate de fruits but they were a failure as they did not set to the right consistency. Instead, I used them as a filling for my white chocolate bonbons. The second time around I tried watermelon basil pate de fruits from this recipe but these also did not set up. All thanks to thermometer! (I would like to believe my technique was fine 🙂 )
I will definitely give pate de fruit another try but for now I have had a candy-making overkill and would like to get back to baking cakes and cooking savory stuff! And honestly, I prefer eating a whole fruit than its candy form. But, that fact aside, I would still like to know that I can make pate de fruit if I want to. Hence I will definitely be trying them again.
With the same logic, I’ll give honey comb another try as well.
I did get a faint honey comb structure on my candy but not like it should have been.
These were all packed and distributed. Of course, between the time they were made and delivered a lot of sampling happened. Something my dentist will definitely frown upon and my behind will regret very soon!
TEMPERING CHOCOLATE USING THE “SEEDING” METHOD
Tempering is a method of heating and cooling chocolate in order to use it for coating or dipping. Proper tempering gives chocolate a smooth and glossy finish. Tempered chocolate will have a crisp snap and won’t melt on your fingers as easily as improperly tempered chocolate. Properly tempered chocolate is also great for molding candies because the candies will release out of the molds more easily and still retain a glossy finish.
Tempering Ranges:
Celsius
Dark: 45°C-50°C > 27°C > 32°C
Milk: 45°C > 27°C > 30°C
White: 45°C > 27°C > 29°C
Fahrenheit
Dark: 113°F-122°F > 80.6°F > 89.6°F
Milk: 113°F > 80.6°F > 86°F
White: 113°F > 80.6°F > 84.2°F
Two-third of finely chopped chocolate is melted and heated until it reaches 45°C / 113°F. One-third of un-melted chocolate is then stirred and melted in until it brings the temperature down to 27°C/80.6°F. It is then put back over heat and brought up to its working temperature of 32°C/30°C/29°C /// 89.6°F/86°F/84.2°F depending on the chocolate you’re using. It is now ready for using in molds, dipping and coating.
Tip: Make sure that your bowl fits snuggly into the saucepan so that there’s no chance of steam forming droplets that may fall into your chocolate. If water gets into your chocolate it will seize! Also, if you’re using the chocolate to dip a lot of truffles etc. which means the chocolate will be sitting off heat for a while it will naturally start to thicken as it cools. To keep it at an ideal viscosity for even coating, put the bowl over steam for 30sec – 1min every 10 – 15mins, just do not let the temperature go over the working temperature! Having the chocolate in a warmed glass bowl and wrapped in hot kitchen towel can also help keep the chocolate at its working temperature for longer.
1. If using colored cocoa butter and plastic molds, paint designs at the bottom of the wells in each mold. Let dry. You can also use lustre dusts mixed with a bit of extract or vodka, instead of colored cocoa butters for a nice sheen. Let painted molds dry.
2. When coating the molds with the tempered chocolate, I like to do it how the chocolate pro’s do it (much faster and a lot less tedious). While holding mold over bowl of tempered chocolate, take a nice ladle of the chocolate and pour over the mold, making sure it cover and fills every well. Knock the mold a few times against a flat surface to get rid of air bubbles, then turn the mold upside down over the bowl of chocolate, and knock out the excess chocolate. Turn right side up and drag a bench or plastic scraper across so all the chocolate in between the wells is scraped off cleanly, leaving you with only chocolate filled wells. Put in the fridge to set, about 5 to 10 minutes. Alternatively, you could take a small brush and paint the tempered chocolate into each mold, or spoon it in if you’d like.
3. Remove from refrigerator and fill each well with the filling of your choice. Again take a ladle of chocolate and pour it on top of the filled chocolate wells, knocking against a flat surface to settle it in. Scrape excess chocolate off the mold with the bench scraper then refrigerate until set.
4. When set, pop your beautiful filled chocolates out of each well and enjoy!
DIPPING IN TEMPERED CHOCOLATE
1. Temper the chocolate using either the marble top or seeding method
2. Once the chocolate is in temper, gently lower your truffle or candy into the tempered chocolate with your dipping fork
3. Gently remove the candy once it’s been fully submerged
Tip: It’s best to use a bowl that’s deep rather than shallow so that the truffle is easily covered
4. Tap fork on the side of the bowl to remove excess chocolate
5. Scrape off excess chocolate from under the dipping fork on the side of the bowl
6. Place dipped truffle/candy on parchment paper, decorate as you wish and allow to set
7. Once the chocolate has hardened, trim off any “feet” with a sharp knife
Tip: Try to handle the chocolate as little as possible or wear food safe gloves to that you don’t leave fingerprints on the chocolate
Tip: To help the chocolate to harden faster, you can place the chocolate into the fridge for 15-20mins, but avoid leaving them in for longer than that so as to avoid any “sweating” (water droplets forming on the chocolate)
MAKING CHOCOLATE BARK
Chocolate bark is really fun & easy to make (kids love making this stuff!). You can also decorate it with almost anything you like, nuts, dried fruits, seeds, crushed candies, honeycomb etc. The whole idea of chocolate bark is that it’s rough in texture and look, just like bark. You can cut it in neat squares, or my favorite, break it up in rough pieces. It’s also great to use up left over tempered chocolate, either plain or if you’ve mixed in crushed nuts to use for coating truffles.
1. Line a baking tray with parchment paper.
2. Temper your chocolate using your preferred method.
3. Once tempered, spread the chocolate over the parchment paper.
4. Sprinkle your ingredients over the chocolate.
5. Leave to set.
Tip: To help speed up the setting, you can put it in the fridge for about 15-30min. Don’t leave it in the fridge to avoid the chocolate from sweating (water droplets will form on the chocolate)
6. Either break or cut into pieces.
7. Store at room temperature in an airtight container.
I added creme de menthe chocolate chips and toasted pecans to make the bark.
Adapted from here
Garrett from Vanilla Garlic says “Cutting caramel is a methodical practice. Turn the sink on to a mere dribble and wait for it to heat to scalding. Run the knife under the water and patiently wait for the heat to transfer through the tang until the metal radiates in your hand. Quickly clean off the water with a towel and then cut through the brick of caramel. The piping hot knife should glide through effortlessly and leave the sides of each individual bite of caramel nearly seamless and smooth as cut class. Repeat for each cut.”
Ingredients
Directions
1. Line a 7X11 pan with a piece of parchment paper (the paper will droop over the sides) and butter well.
2. Stir together the cream, sugar, corn syrup, and salt together in a heavy bottom pan. Bring to a boil and continue to cook until it reaches 250F. Remove from heat and let cool for a five minutes. Be careful when waiting for it to reach 250 F because it might flow over. And since I had to put it on low it took a looooooong time. I would recommend using a really deep bottom pan
3. Add chocolate and the green tea. Stir together and pour into the pan and spread with an offset spatula. Let the caramel sit for a few hours.
4. Cut apart into 1-inch squares. Serve or store in an airtight container.
Adapted from here
Makes 25 pieces
Ingredients
Directions
Can’t decide between a rich brownie and a classic cookie? This ultimate brookie recipe delivers…
Fresh mango pulp and a spicy kick from the jalapeños makes this refreshing and quick to make…
Homemade mushroom ravioli: a meatless pasta dinner. Homemade pasta dough stuffed with a creamy mushroom…
The perfect christmas tradition of making gingerbread cookies is complete with these spice loaded homemade…
Since the thanksgiving tablescape was such a hit on social media or more…
A one bowl chocolate cake layered with whipped salted caramel ganache. A great crowd pleaser.…